Alright, first off, let’s all make sure we’re on the same page here; you’ll need:
- Your second CD that came with Morrowind
- A graphics program (Photoshop or PaintShop Pro)
- NifTexture
(Click the thumbnails to see the full size images.)
Lets say we want to edit the Silver Dagger in Morrowind.
Starting Off
Now, we both know that the files for the dagger can be found on the second CD of Morrowind.
However how do we find them? That’s a lot of files to look through!
So lets do this:
Open the Construction Set (you did install it when you installed Morrowind, right? If not, pop in the play CD and browse around until you find the installer!).
Go to the file menu and select Data Files.
Put a check mark next to Morrowind.ESM (should be at top of the list) by clicking twice on the box. Click OK.
Now be patient as the editor loads up the files. (go make some coffee or grab a snack)
Once everything is loaded up, look at your Object Window (the one that reminds you of Microsoft Excel, but it has tons of tabs at the top). Click on the ‘Weapon’ Tab.
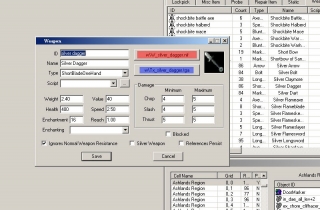
Scroll down until you find the Silver Dagger. Double click on its name and a menu should come up. See the picture in the upper right corner?
The red box is the NIF and the blue one is the icon.Take note what these say:
Mesh: w\W_silver_dagger.nif
Icon: w\Tx_silver_dagger.tga
These tell us where they’re located in the second CD! Much easier than sorting through all that stuff, no?
Finding The Right Files
Next, close the editor and head over to you second CD. Find the Data Files folder, go inside. Next go into the meshes folder. Now, remember how it said w\W_silver_dagger.nif?
Well, we’re looking for the W_silver_dagger.nif in the w folder (w stands for weapons…in case you hadn’t figured that out already 😉 ).
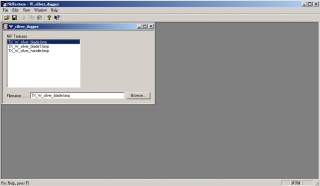
Copy that mesh to your desktop (right click on it and drag it to desktop and choose ‘copy here’). Now, open it with NIFtexture.
Ok, see those three .bmps listed there?
Those are the names of the textures we’re looking for! Now, head back to your second CD, but now go into Data Files -> Textures and fish out those three files. If you open them with your graphics program of choice, you will notice that each one contains a certain part of the dagger.
The Texture
Make your modifications of choice
I’m just going to show you what piece of the dagger each texture representsTX_W_silver_blade = green
TX_W_silver_blade1 = red
TX_W_silver_handle = blue
Make sure when you’re done to save each one under a different name (for example, for me, I put B1_silver_blade to distinguish it from other people’s textures and so that it does not replace that original silver crossbow’s texture ingame!); save each one as bitmap for now.
I’ll talk more about different file types later. Save them to your desktop too!
The Mesh
Now, we have our textures, but we need to apply them to the mesh. Go back to NIFtexture and open the silver dagger, click on TX_W_silver_blade and the select ‘browse from the bottom corner. Now, find your file (it should be on your desktop, so select desktop and then double click on your file. Now the name TX_W_silver_blade should be replaced with (in my case) B1_silver_blade (yours should be different, at least if you release the mod, please change it). Now, repeat the steps for the other two bmps listed.
A lot of modders, including me, like to use subdirectories for their textures, helps to keep things more organised, to do that you need to set up the file path like so Textures\subdirectory name\texture name , after browsing for your file you will need to manually type the Texture\subdirectory name as NIFtexture will not add it automatically. It is important to get the file paths right or your textures will not show up ~ Cali
Next go to File and Save as. Choose a different name, in my case B1_silver_dagger.
Now you have your .nif!
Alright, let’s take a look at our work. Find the Data Files directory on your computer (where you installed Morrowind, NOT on the CD where you got the files! XD) and move your three bmps into the Textures folder and the .nif into the meshes folder.
Now, open up the construction set, but don’t load anything, we’re just taking a quick peek.
Right click in the Object Window again (under the default tab that comes up activator, that’s ok for now!) and click on the add art file. Browse until you get to your Morrowind directory, then look in the meshes folder until you find your mesh. Open that and then select Ok. You should have a new entry in that list. Drag that entry into the Render Window (big blank grey thing). See that? That’s YOUR dagger! 🙂
The Icon
What’s this you say, now we need an icon? Well, everyone has their trick to doing this, but here’s mine. Position your weapon in the preview window as you want the icon to look. Hit the “Prnt Scrn” button on your keyboard (usually above your insert key). Now don’t copy anything (ctrl+c or the like).
Go back to photoshop and create a new workspace (ctrl + n and make SURE you select the background as being transparent otherwise you’ll have some ‘issues’) and paste your screen (ctrl + v). Now, crop the image so just your dagger is showing (try to make the crop ‘squarish’). Next, use the magic wand tool to take out the background (yeah, I know, sometimes it’s kinda hard to do when the background is the same color as you item). You can always zoom in with the eraser and ‘prune’ about too. There are also various tips and trick for both Photoshop and Paintshop, but I don’t have Paintshop so my advice won’t work all the time. And even the best of us have to zoom and prune at times.
Anyway, when you’re done with that, resize the image to 32 x 32 (to avoid distortion, it is best if you’d gotten you image as squarish as possible through cropping and gotten rid of excess background around it). This may take you a couple of tries until you get it how you like it, you could also take just a portion of the weapon and resize it so that you get a more detailed icon, but don’t see the entire shape (Bethsoft does this a lot with their icons).
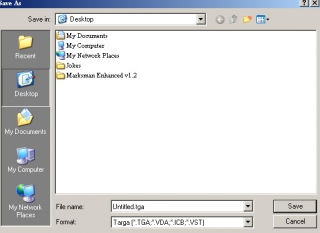
Anyway, go to file and save as, but DON’T choose BMP this time. Since we want just the icon and not the other white stuff around it, we shall select either dds or tga (note that dds needs a plugin).
So for simplicity’s sake, choose tga. For transparent icons be sure to choose 32bit in the save dialogue window.Alright, take this file and put it in your Icons (like your mesh went into your meshes).
And don’t forget the unique name.
Putting It Into The Game
Alright, now fire up the Construction Set and load the Morrowind Data File again. In the object window, click on the Weapons tab, then right click anywhere inside and select new.
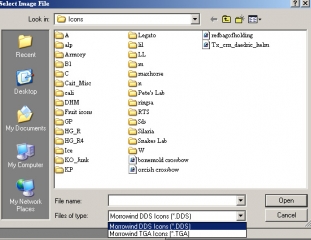
Under Add Art File, load up your Nif from the Meshes and under inventory image load up you icon (we saved it as a tga, but it won’t show up because by default it looks for .dds; so,
see that little thing at the bottom that says files of type? click on it and select tga).
Once you’ve added those two files, fill out all the other stats (pretty self explanatory, just make sure your id is unique so that you don’t get an error for using one already used by the game; to be on the safe side, some modders put their initials first, so I would go B1_silver_dagger).
When done with the stats, you could load up the Seyda Neen cell and drag it into the game world. You’re up high in the sky you say? …well, you can hold the V key to zoom in on
stuff, you can rotate with Shift (and if you select and object and then hold shift, you rotate around it!), hold spacebar and move mouse to pan. Drag your dagger near the ground and save the plugin something creative! (my new dagger? …the punisher? …Bravo 1 shut up now?).
Now, launch Morrowind, click on Datafiles, find you plugin and put an x next to it to enable it. Hit the play button and go to Seyda Neen to find your dagger!
Nifty eh?
Now What’s All This Huff About Bmp, DDS, and Tga?
Well, let’s put it this way:
Bmp is the most common form of texture; it also happens to take up quite a bit of space and does not support transparencies (which is why Morrowind won’t let you make your icon bmp).
DDS is a pretty compressed alternative, the only problem being that the more you edit a DDS, the more quality loss (so always resave a DDS as bmp when you open it and want to mess with it; when done, THEN you can resave as DDS). DDS also supports mip maps (changes the texture size depending on players distance from said object, really good for faces so that major distortion is avoided when looking at that said face from afar). It also supports various types of transparencies.
Tga supports transparencies, but there is only one type, so no customization there :-/. It also happens to take up a fair amount of space, but the quality is good and I believe you can freely resave when editing them, unlike with DDS.
For best practice save as a layered file, PSD, PSP etc. while working on your textures then save a copy to whatever file type you intend to use for the game when finished. Makes any alterations much easier and also helps prevent the quality loss from resaving the same file over and over ~ Cali
I don’t know everything certainly, so don’t quote me 😉 If you want all the technical stuff about them, google is your friend.
I hope you find this tutorial useful.
Anyway, thanks to the forums for not cutting me off with character limits. (for once!)
Thanks to Happyhannah for unwittingly prompting the making of this tut.
Thanks to the maker of NIF texture, may you walk on warm sands…always!
Thanks to Bethsoft for the game. 🙂
Making Icons in Paint Shop Pro
Originally posted on Perceptual Motion by Calislahn
For the benefit of Paint Shop Pro users I will explain how to to do transparent icons.
Icon
To elaborate on what Bravo wrote, do the first stage the same to get your screenshot of the object. Depending on the objects colour you can sometimes use the fog of war button in the Construction Set to give you a black background for your icon. Obviously isn’t as successful with dark coloured objects as it makes the magic wand part more difficult.
Next got to Paint Shop Pro and paste as a new image.
Under selection tool choose square and make a selection of your dagger, hitting ctrl-c then ctrl-v will paste your selection to a new image.
Now use the magic wand to select the grey or black area of your image, you can try adjusting the tolerance to make it take a better selection, the lower the number the nearer the pixel shade has to match for it to be included in the selected area, then what I normally do if the background is grey is to flood fill my selection with black.
Next go to the selection menu and choose invert, it will now select the object, if it is a dark object it’s a good idea while it is selected to increase the brightness a little as this will make it easier to see against the dark background of the inventory screen in game.
Next also in the selection menu go to load/save selection here you will see choices to load a selection from the disk or from an alpha channel, or to save a selection to disk or alpha channel.
We want save selection to alpha channel, when you get the preview come up you should have a white version of your object and a transparent or black background. There is a button below the preview screen to toggle between transparent or black.
Save then go to the image menu and resize to 32×32.
Now you can save your new transparent icon as a tga.
The same method for saving alpha channels applies to clothing, just select the areas you wish to keep then save to alpha channel. More elaborate alpha’s can be done using the mask tool.
How To Use Mask Layers In Paint Shop Pro For Transparency
I decided to use Neuman’s tight dress for an example so here goes.
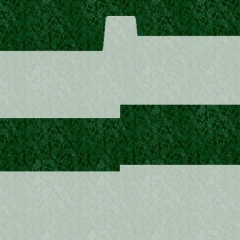
First I made a quick texture
As you can see certain areas I lowered the opacity of the flood fill tool to make it more transparent.
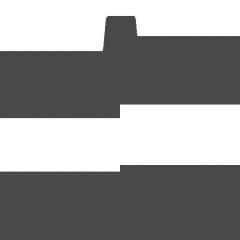
Next I went into the Layer menu and under new mask layer chose from image. Then in the pop up menu I chose source opacity which gave me a mask layer that looked like this
Next I clicked on the mask layer to make it the active one and selected the whole image, I then saved this to an alpha channel( same as for the icons) and then saved my texture as a tga.
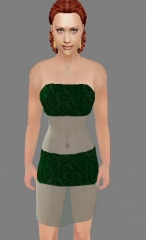
Here is the finished dress
Since this tutorial was written I have discovered a very good Photoshop action for making alpha channels easily, it can be found along with a tutorial on this site here robinwood.com just choose white halo from the menu.
