Setting up new clothing or armour
This tutorial assumes that you have already made your item of clothing/armour for tips on how to do that see here
Step 1- Body Parts
Making a new body part
Load your mod up in the cs, or if you haven’t made one yet load up the relevant master files you wish your mod to be dependant on.
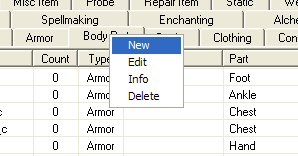
Go to the body part tab and right click on the tab, this will bring up a menu, choose new.
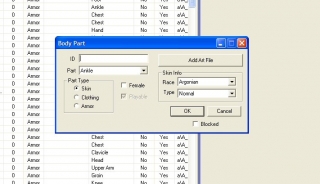
This will bring up a new window like so
Lets go through all the options.
ID – this is the name of your body part, it is always a good idea to start everything with a prefix to keep your mod unique from others and prevent conflicts, I generally use cali.
Part – this is the body part the item will use/replace. Most Better Bodies clothing uses different slots to what you would expect, always read the readme’s that came with the models to find out which body part it takes. Or if you are using a resource from another mod check that mod in the cs to see what parts were used.
Part Type – This is fairly self explanatory, if you are making a race check skin, clothing if it’s clothing and armour if it’s armour.
Female – If your clothing or armour is for females only check this box, if it’s a unisex item then leave it blank.
Playable – This is used for making races and applies to heads and hair, if you wish them to be playable you would check this box.
Skin Info – Once again this only applies to races and is used to assign a body part to a specific race, the type menu is for heads and choosing between a normal or a vampire head.
Add World Art – this is where you assign the nif file which is what we are going to do next 🙂
Adding your nif
Now you know all the different section of the body part window we are going to add our new nif.
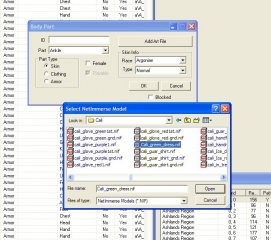
Click on the Add World Art button and it will bring up the meshes folder either in your mw directory or on the construction set cd if you looked there last. If it’s the wrong one just browse for the correct folder.
Now find your nif
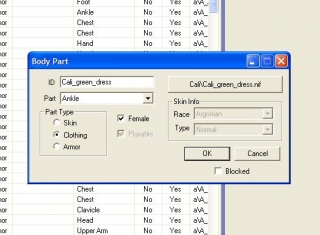
Next choose the relevant part, part type and female if needed like so
Then save you new body part and we are ready to move onto making our clothing ( I will explain how to make new armour shortly)
Step 2 – Clothing Tab
Now we need to go to the clothing tab and like before right click and choose new.
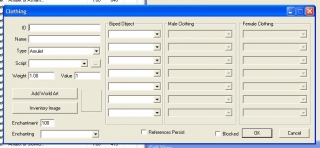
This will bring up another new window
Let’s go through this one 🙂
ID – Like before this is the id of your new clothing, you cannot have two id’s the same so as my first one was called Cali_green_dress I will name this one Cali_dress_green 😉
Name – This is the name that will be seen in game in your inventory or when you mouse over the ground file.
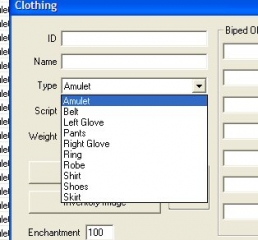
Type – This is the type of clothing for example, pants, skirt shoes.
Amulets, belts and rings are not visible, I will explain later the difference with adding those.
NOTE: Many bb clothing items don’t use the expected type, for instance the dress I am using as an example for this tutorial is a shirt type. Once again check the readme’s to see what they should be.
Script – if you wish to assign a script to your item then use this menu to find it.
Weight – how much the item weighs, I usually base mine on the weight of one of Bethesda’s items of the same type.
Value – set this however you prefer, I personally try to keep within Bethesda’s pricing range but some people like their stuff to be uber expensive 😛
Note: Value effects the way people greet you, the clothing modifier in dialogue is based on the total amount of all items worn by the player so even if you have a beautiful outfit on but it only cost 1 gold you will be greeted like you are in rags 😉
Add World Art – this is where you add the ground art for your clothing, what you see when you drop the item on the floor.
Inventory Image – this is where you add the icon that will show up in yours or the merchants inventory.
Enchantment – the amount of enchantment points your clothing item will have. If you are using an item with alpha channels bear in mind you will get the problem of the whole mesh showing as a plastic wrap effect if enchanted. Sometimes it is a good idea to set items like that to 0 so they cannot be enchanted by the player.
Enchanting – this drop down menu lists all the enchantments available if you wish to apply an enchantment to your item.
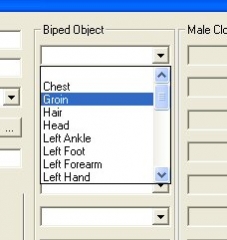
Biped Object – this is where the body parts are listed like so
Some such as skirt and shield have their own listing, this is because if you set them up as groin or wrist they would remove that body part, this way they overlay it 🙂
Male Clothing – Once you have selected your biped object opening the drop down menu next to it will show a list of all available male clothing types for that body part.
Female Clothing – same as the male but will only show those items that had the female box checked in the body part tab.
References Persist and blocked – Not normally something I ever use for clothing items. References persist will mean the item will remain in the world, blocked makes it read only.
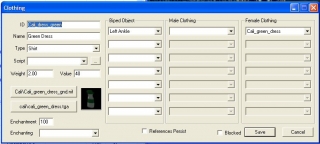
So now we know what everything is we can set up our clothing item. Mine now looks like this.
Save your new item and your ready to go.
Amulets, Belts and Rings
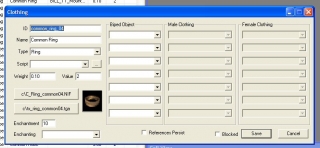
Because these are not visible they do not have a body part assigned, to make one of these items all you need to do is fill in the left hand side of the clothing window like so.
Step 3 – Making an Armour Item
First of all we do exactly the same as in step 1 when we made the body part, but this time under part type check armour (please excuse the spelling difference I’m English :P)
Next go to the Armour tab and like before right click and choose new.
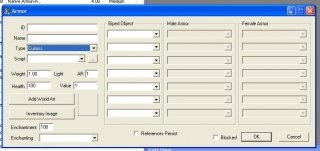
This will bring up the armour window like so
As you can see the layout is exactly the same as the clothing window, but there are differences.
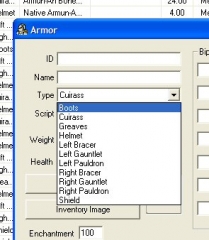
The type menu looks like this
And there are also two new boxes.
AR – This is the armour rating, higher numbers mean better protection.
Health – This is the items health and will affect how often you need to repair it. The higher the number the longer it will last through use without repairing.
One other thing to note is the difference in weight, what you set this to will determine if it is classed as light, medium or heavy armour.
To set up your armour do exactly as you would for clothing, simple! 😀
Step 4 – Adding to a Merchant
So you now have your new clothing/armour and you want somebody to sell it.
Ownership
If a service npc is given ownership of an item that they are set up to trade this will be added to their sales inventory.
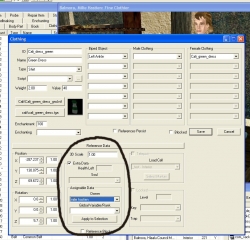
If you place your item into the same room as the npc then double click it to bring up it’s menu you will see a check box for extra data, check this and the greyed out menu’s become available.
Under owner find the name of your npc, in this case Millie Hastien.
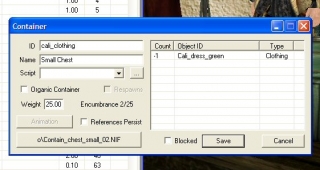
If you have a few clothing/armour items it’s always a good idea to make a container to put them in, this can then be placed near the npc with them assigned as owner and they will sell the items in the chest.
Adding a negative number to the item will make it respawn 🙂
To do that left click the number then left click it again, this is not a double click but two slow left clicks, the number will then be editable. this tip also applies for changing cell names 😉
You can also add the items to an npc’s inventory and give them a negative number, they will then sell these items instead of them just being the npc’s personal objects.
